Free Crochet Headband Pattern
Looking for a cozy and stylish winter accessory you can make yourself? This free crochet headband pattern is perfect for beginners who want to create a beautiful twisted ear warmer with a simple single crochet stitch. Whether you’re making one for yourself or as a thoughtful handmade gift, this easy crochet headband pattern will keep your ears warm while adding a lovely touch to your winter wardrobe. Grab your favorite yarn and hook and let’s get started!
Why You’ll Love This Free Crochet Headband Pattern
There’s something special about creating a cozy accessory with your own hands, especially when the chilly weather arrives! This free crochet headband pattern is perfect for beginners who want to make something beautiful, practical and stylish without complicated stitches or techniques.
Here’s why you’ll love this easy twisted crochet headband:
- Beginner Friendly: Made with the simple single crochet stitch (SC), this pattern is easy to follow, even if you’re new to crocheting.
- Cozy and Comfortable: The dense crochet fabric helps keep your ears warm on chilly days while adding a lovely handmade touch to your winter outfits.
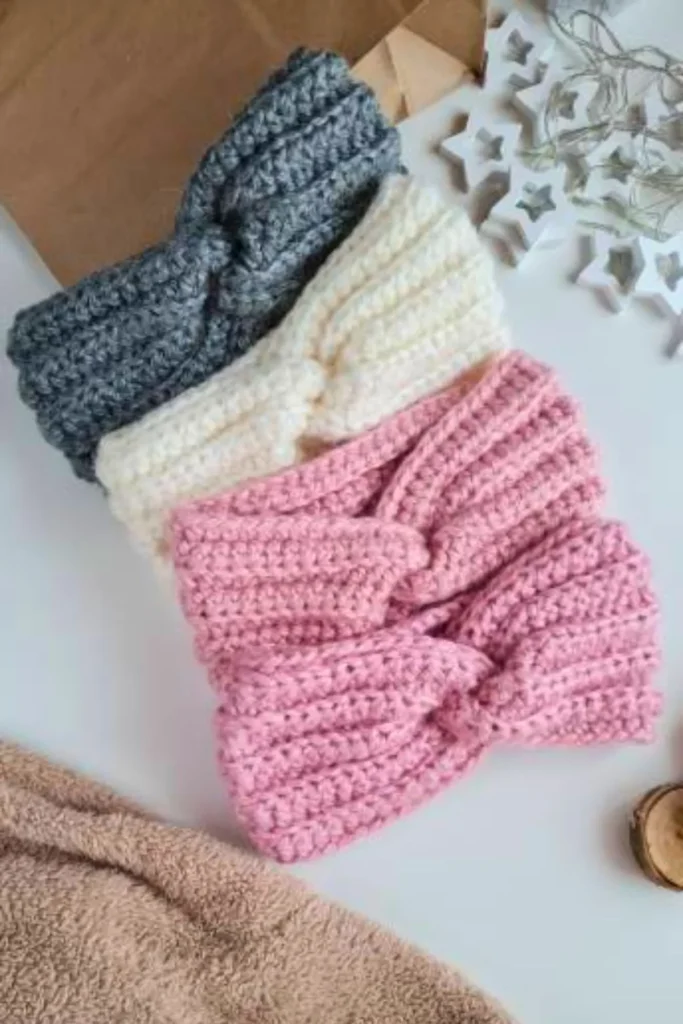
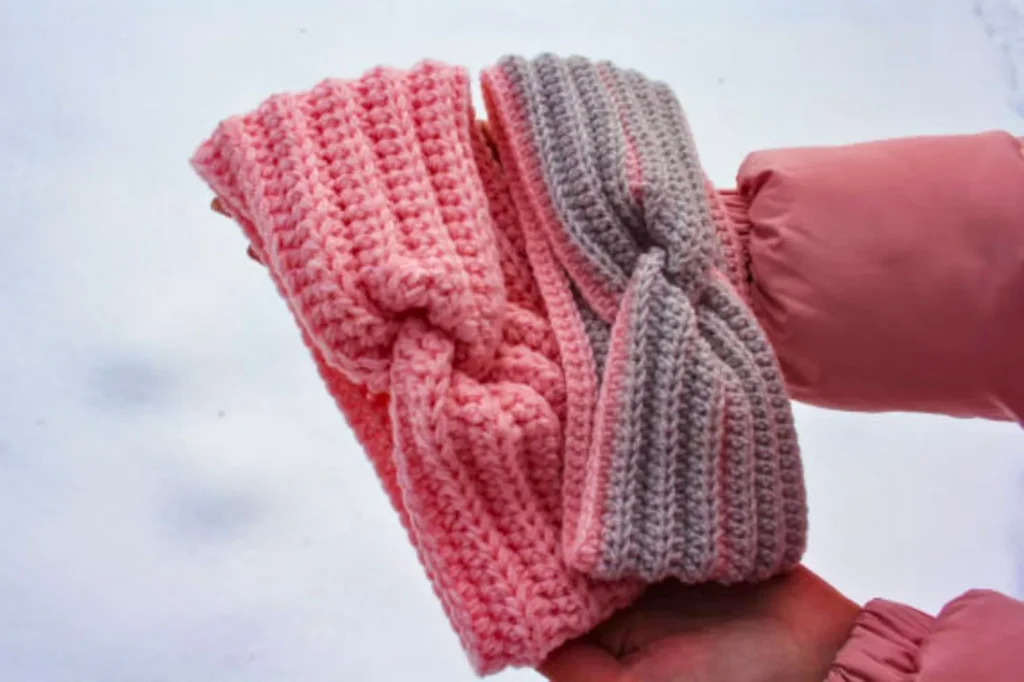
- Stylish Twisted Design: The elegant twist at the front gives this headband a modern look that pairs beautifully with coats, sweaters and scarves.
- Quick and Budget Friendly: With just a few basic supplies, you can create a beautiful accessory without spending much money.
- Perfect Handmade Gift: Make one in a favorite color for a friend, family member or anyone who appreciates thoughtful handmade gifts.
If you’ve been searching for a simple crochet headband pattern free of complicated techniques, this project is a wonderful place to start. Whether you’re exploring different crochet headband patterns or making your very first ear warmer, you’ll love how a little yarn can turn into something both beautiful and useful!
Materials You’ll Need for This Crochet Headband Pattern
Before starting this crochet headband pattern, gather a few simple supplies to make your project easy and enjoyable. With soft yarn, the right crochet hook and a few basic tools, you’ll be ready to create a cozy twisted ear warmer that’s both practical and stylish.
- Worsted Weight Yarn (Category 4): Choose a soft, comfortable yarn in your favorite color. Acrylic or an acrylic wool blend works well for a warm winter headband.
- 5 mm Crochet Hook (US H-8): This is our starting hook size for the single crochet stitch. You may need to adjust it slightly to achieve the correct gauge.
- Scissors: Use sharp scissors to cut the yarn neatly when your headband is finished.
- Tapestry Needle: You’ll need this to sew the ends together and weave in loose yarn tails.
- Measuring Tape: Measure your head and check your headband’s dimensions to help achieve a comfortable fit.
- Stitch Marker (Optional): A stitch marker can help you keep track of your work, especially if you’re new to crochet.
Choosing the Right Yarn
For this free crochet headband pattern, look for yarn that feels soft against your skin and provides enough warmth for chilly days. A smooth, medium weight yarn is a great choice for beginners because it’s generally easy to work with and makes individual stitches easier to see.
If you’re making this headband as a handmade gift, consider choosing a neutral shade for everyday wear or a favorite color that reflects the recipient’s personality.
Beginner Tip: Check the yarn label for the recommended hook size, but remember that your personal tension matters too. Before starting the full project, make a small gauge swatch to check your stitch size and adjust your hook if necessary.
Yarn and Hook Recommendations
Choosing the right yarn and crochet hook can make all the difference when creating a cozy, comfortable headband. For this crochet headband pattern, we’ll use medium weight yarn and a simple single crochet stitch to create a warm, textured ear warmer that’s beginner friendly and perfect for chilly days.
Best Yarn for a Crochet Headband
Worsted weight yarn (Category 4) is a great starting point for this twisted crochet headband. It’s easy to handle, widely available and thick enough to create a cozy fabric without making the finished headband feel unnecessarily bulky.
Here are a few things to look for when choosing your yarn:
- Softness: Choose yarn that feels gentle against your forehead and ears, especially if you plan to wear your headband for several hours.
- Warmth: Acrylic, wool or an acrylic wool blend can help create a comfortable winter accessory.
- Stitch Definition: A smooth yarn makes it easier to see your single crochet stitches, helping beginners keep their rows neat and consistent.
- Color: Choose a neutral shade for everyday outfits or a beautiful seasonal color to make your handmade accessory feel extra special.
What Crochet Hook Size Should You Use?
Start with a 5 mm (US H-8) crochet hook for this pattern. This is a practical starting point for many worsted weight yarns, but your ideal hook size will depend on your yarn and personal crochet tension.
Because single crochet creates a relatively dense fabric, the goal is to make a headband that feels warm yet comfortable, with enough flexibility to fit securely without feeling too tight.
Before beginning the full project, crochet a small gauge swatch and measure your stitches. If your fabric feels too stiff or your stitches are too tight, try a larger hook. If the fabric is too loose, a smaller hook may help.
Why Gauge Matters for the Perfect Fit
Gauge helps you control the finished size of your headband. Even when two crocheters use the same yarn and hook, their results can differ because everyone holds the yarn a little differently.
For the best results, measure your swatch before calculating the final number of stitches and rows. This simple step can help you create a twisted ear warmer that fits comfortably and looks beautifully finished.
Beginner Tip: Don’t worry if your first swatch isn’t perfect! Adjusting your hook and checking your gauge are normal parts of learning crochet. Taking a few extra minutes now can help you make a headband you’ll be proud to wear or give as a thoughtful handmade gift.
Crochet Abbreviations and Stitch Guide
If you’re new to crochet, don’t worry! This crochet headband pattern uses a simple stitch and beginner friendly instructions to help you create a cozy twisted ear warmer with confidence. Once you understand a few basic crochet abbreviations, following the pattern will feel much easier.
Crochet Abbreviations
This pattern uses standard US crochet terminology. Here’s a quick reference to help you understand the instructions:
- ch – Chain
- sc – Single crochet
- If you’re new to crochet, the Craft Yarn Council’s single crochet tutorial can help you learn the basic stitch before starting this pattern.
- st(s) – Stitch(es)
- rep – Repeat
- sk – Skip
- sl st – Slip stitch
- RS – Right side of the work
- WS – Wrong side of the work
New to crochet abbreviations? Check out the Craft Yarn Council’s crochet abbreviation guide for help understanding common terms used in crochet patterns.
How to Make a Single Crochet Stitch (SC)
The single crochet stitch is one of the easiest stitches to learn, making it a wonderful choice for a simple crochet headband pattern free of complicated techniques. It creates a neat, sturdy fabric that’s ideal for a warm winter ear warmer.
Follow these steps to make a single crochet stitch:
- Insert your hook into the indicated stitch.
- Yarn over and pull up a loop. You should now have two loops on your hook.
- Yarn over again and pull through both loops.
- You’ve completed one single crochet stitch!
Repeat these steps across the row, following the stitch counts provided in the pattern.
Tips for Neat, Even Stitches
- Count your stitches: Check your stitch count at the end of each row to keep the headband consistent in width.
- Keep your tension relaxed: Tight stitches can make the fabric stiff and less comfortable to wear.
- Watch your first and last stitches: These are easy to miss, especially when you’re learning.
- Use a stitch marker: Mark the first or last stitch of a row if you need help keeping track.
Remember, every crocheter starts somewhere. Take your time, enjoy the rhythm of each stitch and don’t be afraid to undo a row if something doesn’t look right. With a little patience, you’ll be on your way to creating a handmade headband that’s both practical and beautiful.
Size, Gauge and Fit
Getting the right fit is one of the most important parts of making a comfortable twisted ear warmer. This crochet headband pattern is designed with a cozy, close fitting style that helps keep your ears warm without feeling too tight. With a few simple measurements, you can adjust the headband to suit your needs or create a thoughtful handmade gift.
Finished Headband Size
For this beginner friendly design, aim for the following approximate adult size:
- Finished width: About 4 inches (10 cm).
- Head circumference: Approximately 21-23 inches (53-58.5 cm).
- Target finished circumference: Approximately 19-21 inches (48-53 cm), depending on the stretch of your yarn and stitches.
The finished headband is intended to be slightly smaller than the wearer’s head so it can fit securely. However, the right amount of negative ease depends on the yarn, stitch tension and elasticity of the fabric.
These measurements are starting guidelines, not guaranteed finished dimensions. Check the fit with your chosen yarn before completing the final seam.
What Is Crochet Gauge?
Gauge is the number of stitches and rows you make within a specific measurement. For this pattern, use a small single crochet swatch to check how your stitches compare with the intended measurements.
As a preliminary target, you can test for approximately 16 single crochet stitches and 18 rows per 4 inches (10 cm) using worsted weight yarn and a 5 mm crochet hook. This is a target for testing, not a verified gauge; your actual results may vary.
To check your gauge:
- Make a swatch using the same yarn and hook you plan to use for the headband.
- Work enough rows to create a sample larger than 4 inches square.
- Measure a 4 inch section in the center of the fabric.
- Count the stitches across and the rows vertically.
- If necessary, adjust your hook size and make another swatch.
For the most reliable results, wash and dry the swatch according to the yarn label before measuring it again.
How to Adjust Your Crochet Headband Size
One of the best things about making your own accessory is being able to customize the fit.
- For a smaller head: Shorten the strip slightly, then check that it still fits comfortably before joining the ends.
- For a larger head: Increase the strip length while maintaining the same stitch pattern and width.
- For a wider headband: Add more foundation chains, keeping in mind that the finished width will depend on your actual row gauge.
- For a narrower headband: Use fewer foundation chains and measure the width as you work.
Always check the strip’s dimensions before creating the twisted front. The twist and joining method can affect the final fit, so leave enough time to test the construction before weaving in your yarn ends.
Whether you’re making your first ear warmer or exploring different crochet headband patterns, taking a few minutes to check your measurements can make the finished accessory feel much more comfortable and personal.
Free Twisted Crochet Headband Pattern
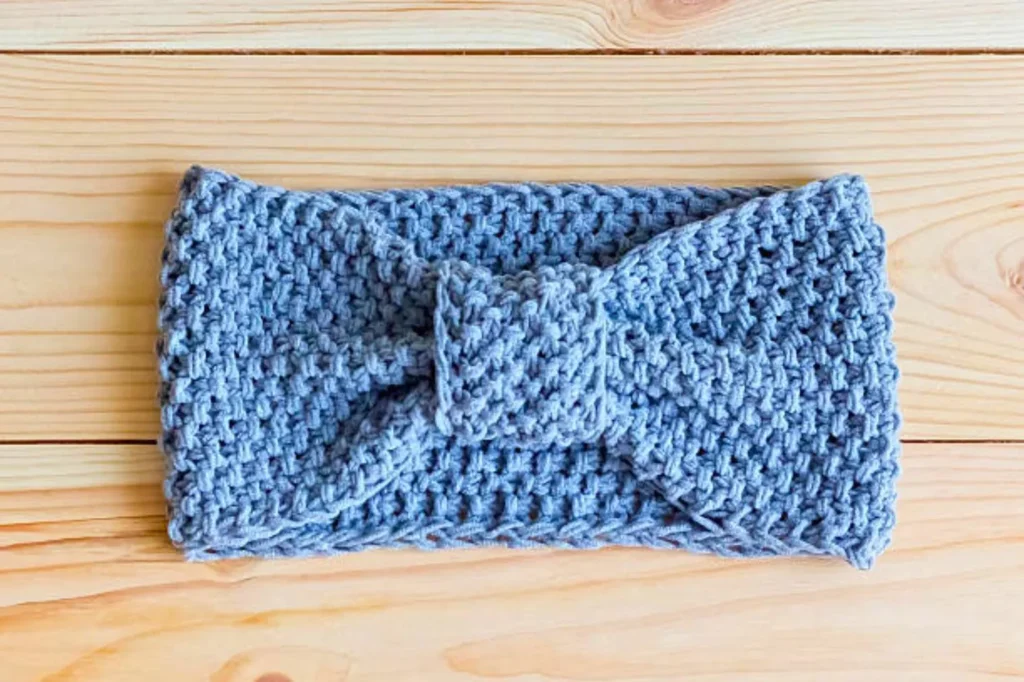
Ready to create a cozy accessory you’ll love wearing all winter? This free crochet headband pattern features a simple twisted front, a comfortable ribbed texture, and beginner friendly instructions using the single crochet stitch. It’s a lovely project for a quiet afternoon, a handmade gift or your first attempt at making a stylish crochet ear warmer.
Follow the steps below to crochet the headband strip, shape the twist, and join the ends for a neat finish.
Pattern Details
- Skill Level: Beginner
- Project Type: Twisted crochet headband / ear warmer
- Terminology: US crochet terms
- Stitch: Single crochet (SC), worked through the back loop for added flexibility
- Yarn: Worsted weight yarn (Category 4)
- Hook: 5 mm crochet hook
- Target Size: Adult
- Construction: Flat rectangle joined with a twisted front seam
Materials
- Approximately 50-80 g of worsted weight yarn
- 5 mm crochet hook
- Scissors
- Tapestry needle
- Measuring tape
- Stitch marker (optional)
Abbreviations
- ch: Chain
- sc: Single crochet
- BLO: Back loop only
- st(s): Stitch(es)
- rep: Repeat
Step 1: Make the Foundation Chain
To create an adult headband approximately 4 inches (10 cm) wide, start with ch 17.
Row 1: Sc in the second chain from the hook and in each chain across. You should have 16 sc.
Ch 1 and turn. The turning chain does not count as a stitch.
Step 2: Crochet the Headband Strip
Row 2: Sc in the back loop only (BLO) of each stitch across. You should still have 16 sc.
Ch 1 and turn.
Rows 3 onward: Repeat Row 2, working one sc in the back loop of every stitch.
Continue until the strip measures approximately 19-20 inches (48-51 cm) long, or until it reaches the length needed for your head measurement and desired fit.
Keep your stitch count at 16 sc throughout the project. Measure the strip as you work rather than relying on a fixed row count, since yarn thickness and individual tension can affect the finished length.
Step 3: Shape the Twisted Front
Now comes the fun part! The twist gives this simple crochet headband its stylish, finished look.
- Lay the strip flat with the two short ends facing each other.
- Fold one short end in half across its width, bringing one half of the strip’s width toward the other.
- Fold the other short end in half in the opposite direction.
- Interlock the folded ends so the four layers alternate, with the folded sections fitting together like the pieces of a simple puzzle.
- Check that the raw edges line up and that the front forms a smooth twist without any bulky bunching.
Take your time arranging the layers before sewing. If the twist looks uneven, unfold the ends and try again.
Step 4: Join the Ends
Using your tapestry needle and the yarn tail, sew through all four layers of the interlocked ends.
- Make small, secure stitches through every layer.
- Keep the seam firm enough to hold the twist, but avoid pulling so tightly that the fabric puckers.
- Check that the join is secure before cutting the yarn.
If necessary, turn the headband to inspect the seam and adjust the twist so it sits neatly at the front when worn.
Step 5: Finish Your Crochet Headband
Weave in all loose yarn ends using your tapestry needle. Trim any excess yarn carefully, taking care not to cut into the finished stitches.
Gently shape the headband with your hands and try it on to check the fit. The band should sit comfortably around your head and cover your ears without feeling uncomfortably tight.
If the strip feels too loose or too tight, adjust the length the next time you make the pattern. A small change can make a big difference in comfort.
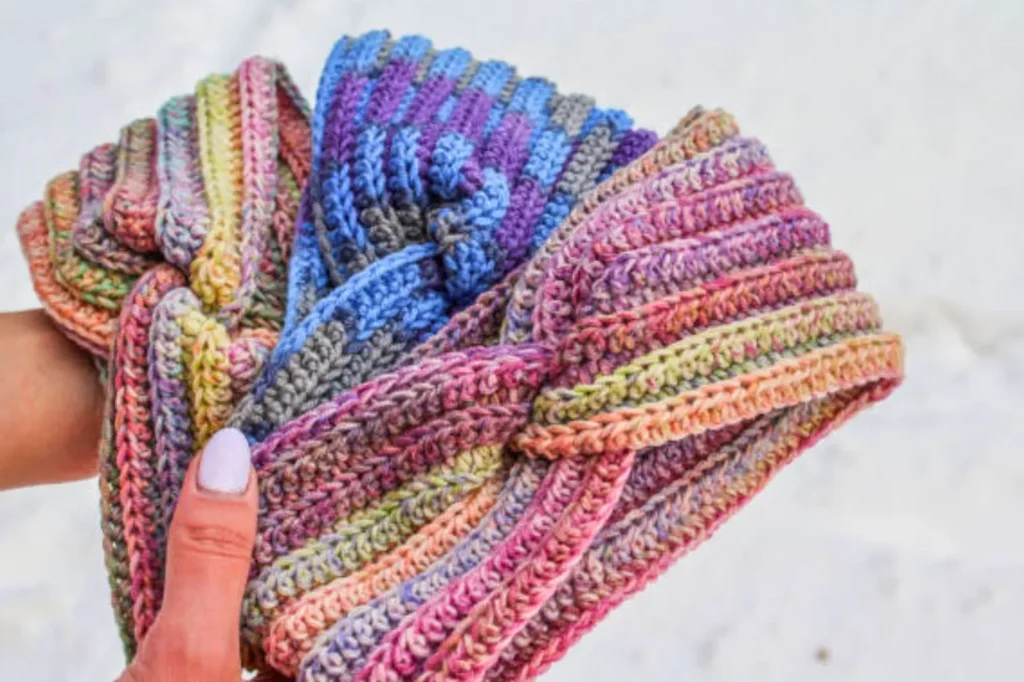
Congratulations! You’ve made a handmade twisted crochet headband using a simple stitch and a few basic supplies. Choose your favorite yarn color, and you can create another one to match a winter coat, make a thoughtful gift or add a cozy handmade accessory to your wardrobe.
How to Adjust Your Crochet Headband Size
One of the best things about making your own crochet headband is being able to customize it for a comfortable, personalized fit. Whether you’re making a cozy ear warmer for yourself or creating a thoughtful handmade gift, a few small adjustments can help your headband feel just right.
How to Make a Smaller or Larger Headband
The easiest way to adjust this twisted crochet headband is to change the length of the strip before joining the ends.
- For a smaller head: Crochet a shorter strip and check the fit around the head before sewing the twist.
- For a larger head: Add more rows until the strip reaches the desired length.
- For a snug fit: Make the finished band slightly smaller than the head circumference, allowing for comfortable stretch where the yarn and fabric permit it.
- For a looser fit: Add a little length to the strip, then try it on before finishing the seam.
Remember that the single crochet stitch worked through the back loop creates texture, but the amount of stretch depends on your yarn, hook size, and tension. Always check the fabric before deciding on the final length.
How to Adjust the Headband Width
You can also change the width to suit your style.
- For a wider ear warmer: Add more chains to your foundation chain, then check the width of your first row.
- For a narrower headband: Use fewer foundation chains.
- For a cozy winter look: A wider band can provide more coverage around the ears and forehead.
Changing the foundation chain affects the width, while adding or removing rows affects the length. Keep these two measurements separate so you can adjust one without unintentionally changing the other.
Tips for Getting the Best Fit
Before joining your headband, wrap the strip around your head and check that it feels secure without pulling uncomfortably. Remember that the twisted seam changes how the ends come together, so test the twist before weaving in your yarn tails.
If you’re exploring different crochet headband patterns or adapting this free crochet headband pattern for someone else, measuring first can save time and help you create a more comfortable result.
The beauty of handmade accessories is that they can be tailored to the person wearing them. With a little measuring and patience, you can create a twisted ear warmer that feels personal, looks stylish and is made to be enjoyed all winter long.
Tips for Beginner Crocheters
If this is your first crochet project, don’t worry! This crochet headband pattern is designed to help you build confidence while creating a cozy, stylish accessory you’ll love wearing or gifting. With a few simple techniques and a little patience, you can make a beautiful ribbed headband even if you’re still learning the basics.
1. Keep Your Stitch Tension Consistent
Try to keep your yarn tension relaxed and even as you work. Tight stitches can make your headband stiff and difficult to stretch, while loose stitches may create an uneven texture. If your first few rows look a little different, that’s completely normal! Take your time until you find a comfortable rhythm.
2. Count Your Stitches at the End of Every Row
For this pattern, each row should contain 16 single crochet stitches. Counting your stitches regularly helps prevent your headband from becoming wider or narrower as you work. Pay special attention to the first and last stitches, as beginners sometimes accidentally skip them.
A stitch marker can be especially helpful for identifying the last stitch of each row.
3. Work Through the Back Loop Only
The ribbed texture of this free crochet headband pattern comes from working through the back loop only (BLO). Instead of inserting your hook under both loops at the top of the stitch, insert it under the back loop only.
This simple technique creates the flexible, textured fabric that gives your twisted ear warmer its cozy look. If you’re new to BLO crochet, practice on a few stitches before continuing with the full pattern.
4. Measure Your Headband as You Go
Don’t rely only on the number of rows you have completed. Lay your crochet strip flat and measure its length regularly until it reaches your desired size.
For an adult headband, the suggested starting length is approximately 19-20 inches (48-51 cm), but the ideal length depends on your head circumference and how stretchy your yarn and stitches are. If possible, compare the strip with your own measurements before joining the ends.
5. Choose Soft Yarn and Check Your Gauge
A soft, medium weight yarn is a great choice for a comfortable winter accessory. Look for yarn that feels gentle against your skin and provides enough warmth without making the headband too bulky.
Before starting, make a small swatch to see how your stitches look and measure. Your tension may differ from someone else’s, so adjust your hook size if necessary. This step can help you achieve a better fit and a more polished finish.
6. Check the Twist Before Sewing
The twisted detail is what makes this headband special! Before sewing the short ends together, arrange the fabric carefully and check that the twist looks the way you want it to. Make sure the edges line up neatly and that the band isn’t accidentally twisted more than intended.
Take a moment to check the fit before securing the seam and weaving in your yarn ends.
7. Finish Your Headband Neatly
A tidy finish can make a simple handmade accessory look much more professional. Use a tapestry needle to weave the yarn tails securely through several stitches on the wrong side of the fabric. Avoid pulling too tightly, as this can distort the ribbed texture.
Once you’ve finished, gently stretch the band to check its flexibility and inspect the seam to make sure everything feels secure.
Beginner tip: Your first headband doesn’t have to be perfect to be beautiful. Every project teaches you something new, and by the time you finish this one, you’ll have more confidence with single crochet, back loop stitches and shaping a handmade accessory. If you enjoy this project, you can use the same basic skills to explore more free crochet headband patterns and experiment with different yarn colors, widths and textures.
How to Care for Your Crochet Headband
Your handmade crochet headband is more than just a cozy winter accessory it’s a little piece of creativity made with your own hands. With the right care, you can keep it soft, comfortable and beautiful season after season, whether you made it for yourself or as a thoughtful handmade gift.
1. Check the Yarn Care Instructions
Before washing your headband, check the label on your yarn. Different fibers require different care, so following the manufacturer’s instructions is the best way to protect your finished project.
Some yarns can be machine washed, while others are better suited to gentle handwashing. If you’re making this crochet headband pattern as a gift, keeping the yarn label can also help the recipient care for it properly.
2. Wash Gently to Protect the Stitches
If your yarn allows handwashing, use cool or lukewarm water and a small amount of gentle detergent. Submerge the headband and move it carefully through the water without rubbing, twisting, or stretching the fabric.
Rinse thoroughly, then gently press out excess water. Avoid wringing the headband, as this can distort the ribbed texture created by working single crochet stitches through the back loop only.
3. Dry It in the Right Shape
Lay the headband flat on a clean, dry towel or drying rack and gently reshape it. Pay special attention to the twisted section and sewn seam so they retain their shape.
Avoid hanging a wet headband, especially if the yarn is heavy or stretchy, because the fabric may become longer than intended. Always follow the care instructions for your specific yarn.
4. Store Your Crochet Headband Properly
When you’re not wearing your headband, keep it in a clean, dry place away from direct sunlight and excessive moisture. Folding it gently or storing it flat can help preserve its shape and protect the stitches.
If you have made several pieces using different crochet headband patterns, storing them neatly together makes it easy to choose a color or style to match your winter outfit.
5. Keep the Twist and Seam Looking Beautiful
Over time, frequent wear may cause the twisted section to shift slightly. Gently reshape the headband with your hands and check the seam occasionally for loose yarn ends or stitches.
If you notice a loose end, secure it carefully with a tapestry needle rather than pulling it. A little maintenance can help your handmade accessory stay comfortable and wearable for longer.
A little care goes a long way! Whether this is your first project or one of many free crochet headband patterns you’ve tried, taking care of your finished piece helps you enjoy the warmth, comfort, and personal touch that make handmade accessories so special.
Frequently Asked Questions About Crochet Headband Pattern
1. Is This Crochet Headband Pattern Suitable for Beginners?
Yes! This crochet headband pattern is beginner friendly because it uses basic single crochet stitches worked through the back loop only (BLO). You don’t need advanced crochet skills to get started. If you can make a chain and work single crochet stitches, you can learn to create this cozy, ribbed headband one row at a time.
2. How Long Should a Crochet Headband Be?
For an adult, a finished headband circumference of approximately 19-21 inches (48-53 cm) can be a useful starting point for a head circumference of around 21-23 inches (53-58.5 cm). However, the ideal length depends on the yarn, stitch tension, and stretch of your fabric.
For this crochet headband pattern free project, measure your strip as you work and compare it with the intended wearer’s head measurement. The band should fit comfortably without feeling too tight or slipping off.
3. What Is the Best Stitch for a Crochet Headband?
There isn’t just one best stitch for every headband. Single crochet through the back loop only is an excellent option when you want a simple ribbed texture with some flexibility. Other popular choices include half double crochet, front post and back post stitches and textured stitch patterns.
For beginners, the back loop single crochet used in this design is a practical way to create a classic winter ear warmer without complicated techniques.
4. What Yarn Is Best for a Crochet Headband?
Medium weight yarn (Category 4) is a convenient starting choice for this pattern. Look for a soft yarn that feels comfortable against your forehead and ears. Acrylic, wool and suitable yarn blends can all work, depending on your warmth preferences and care requirements.
Always check the yarn label and make a small gauge swatch before beginning, since different fibers and brands can produce different results.
5. Can I Make This a Free Crochet Headband Pattern for Kids?
Yes! You can adapt this design for a child by adjusting the strip length to suit the child’s head circumference and the stretch of your fabric. Measure the intended wearer whenever possible instead of relying only on age based sizing.
You may also adjust the foundation chain to make the headband narrower or wider. If you’re creating free crochet headband patterns for different family members, test the fit before sewing the ends together.
6. How Do I Make a Twisted Crochet Headband?
A twisted crochet headband is made by arranging the short ends of the crocheted strip to create a twist before joining them. The exact folding method depends on the construction of the design.
Before sewing the ends permanently, arrange the fabric carefully and check that the twist looks neat from the front. Pin or hold the layers in place, then sew securely through the aligned edges. If you’re new to twisted designs, practice the join before weaving in your yarn ends.
7. How Can I Make My Crochet Headband Stretchier?
The stretch depends on your stitch pattern, yarn fiber, hook size and tension. Back loop crochet often creates a ribbed fabric with more flexibility than working through both loops, but the amount of stretch varies.
Avoid crocheting too tightly and make a gauge swatch to check how the fabric behaves. If you need a different fit, adjust the strip length carefully rather than assuming every yarn will stretch the same way.
8. Can I Make a Crochet Headband Without a Twist?
Absolutely! You can join the short ends of the strip straight across for a simple, classic ear warmer. This is an easy alternative if you prefer a clean, minimalist look or want to practice the basic construction before trying twisted headband crochet patterns.
9. How Much Yarn Do I Need for a Crochet Headband?
The amount of yarn depends on the headband’s width and length, the stitch pattern, your tension, and the yarn weight. A simple adult headband generally uses a relatively small amount of yarn, but the most accurate estimate comes from making a sample and checking your yarn label.
Keep a little extra yarn available for sewing the seam and weaving in the ends, especially if you’re making several headbands as gifts.
10. How Do I Keep My Crochet Headband From Slipping?
A comfortable fit is the most important factor. Measure the headband against the intended wearer’s head and account for the stretch of the finished fabric. If the band is too long or the yarn stretches significantly, it may slip during wear.
Choose a yarn with suitable elasticity, maintain consistent stitch tension, and check the fit before completing the seam. A well fitted handmade headband should feel secure without putting uncomfortable pressure on your head.
Ready to make your own? Gather your yarn and hook, follow the step by step instructions above and enjoy creating a cozy accessory with your own hands. This simple design is a lovely starting point before exploring more crochet headband patterns, experimenting with colors or making thoughtful handmade gifts for the people you love.