Easy Crochet Beanie Pattern for Beginners
There’s something special about making a cozy hat with your own hands, especially when it’s something you can wear on chilly days or give to someone you love. This easy crochet beanie pattern is perfect for beginners who want to create a beautiful, comfortable beanie without feeling overwhelmed. With simple, step by step instructions, you’ll learn how to crochet a beanie you can customize with your favorite yarn, colors and style. Whether you’re making your first crochet beanie or looking for a thoughtful handmade gift, this free crochet beanie pattern will help you create something truly special.
Why You’ll Love This Crochet Beanie Pattern
There’s nothing quite like creating something beautiful with your own hands, especially when it keeps you warm on chilly days or becomes a heartfelt gift for someone special. This crochet beanie pattern combines comfort, simplicity and personal style to make your next crochet project both enjoyable and rewarding.
- Beginner Friendly: If you’re learning how to crochet a beanie, the straightforward instructions will help you work through the project with confidence, even if you’re still building your crochet skills.
- Cozy and Comfortable: Create a soft, warm crochet beanie that feels wonderful to wear during fall and winter. Choose a yarn that matches your preferred level of warmth and comfort.
- Easy to Customize: Make your beanie unique by experimenting with your favorite colors, yarn textures, and finishing details. You can create a classic everyday look or a more modern crochet beanie design.
- Perfect for Thoughtful Gifts: A handmade beanie is more than just a winter accessory. It’s a little piece of your time, creativity and love that friends and family can enjoy throughout the colder months.
- A Versatile Style for Everyone: With the right yarn colors and fit, you can adapt this beanie crochet pattern to suit different personal styles, including simple, classic designs for men and women.
Whether you’re making your first crochet beanie or adding another handmade accessory to your collection, this project is a lovely way to turn a few simple materials into something meaningful.
Materials You’ll Need for This Crochet Beanie Pattern
Before you start your crochet beanie pattern, take a few minutes to gather your materials. Choosing the right yarn and crochet hook can make your project easier, help you achieve a comfortable fit and turn a simple ball of yarn into a handmade accessory you’ll be proud to wear or gift.
Here’s what you’ll need to get started:
- Yarn: Choose a soft, medium weight yarn (Category 4) for a comfortable, everyday crochet beanie. Acrylic yarn is an affordable, beginner friendly option, while wool blends can provide extra warmth during colder months. Always check the yarn label for recommended hook sizes.
- Crochet Hook: A 5.0 mm (H-8) crochet hook is a useful starting point for many medium weight yarns. However, the best hook size depends on your yarn and the stitch pattern, so check your gauge before beginning the beanie.
- Scissors: Keep a sharp pair of scissors nearby to cut the yarn neatly when you’re finished.
- Yarn Needle: A blunt tipped yarn needle helps you weave in loose ends and neatly finish your handmade crochet beanie.
- Stitch Markers: These are especially helpful if you’re learning how to crochet a beanie in the round. They help you keep track of rounds and stitches without losing your place.
- Measuring Tape: Use a flexible measuring tape to check your head circumference and beanie length. Taking accurate measurements before you begin helps you create a more comfortable fit.
Choosing the Right Yarn for Your Crochet Beanie
The yarn you choose can make a big difference in the finished crochet beanie design. Soft acrylic yarn is easy to care for and comes in a wide range of colors, making it a great choice for everyday wear. If you want a warmer winter hat, consider a wool or wool blend yarn that feels comfortable against your skin.
Think about who will wear your finished beanie, too. Neutral shades can create a timeless look, while brighter colors add personality. If you’re making crochet beanies for guys, classic colors such as charcoal, navy, black or olive green are versatile options.
Choosing the right yarn and hook can make a big difference in your finished beanie. If you’re unsure which materials to use, check this helpful guide to yarn weight and crochet hook sizes before getting started.
Beginner Tip: Before starting your beanie crochet pattern, make a small gauge swatch using your chosen yarn and hook. This simple step helps you check your stitch tension and adjust your hook size if necessary, so your finished hat is more likely to fit as expected.
Crochet Beanie Sizes and Measurements
One of the best things about making your own crochet beanie is being able to create a hat that fits just right. Whether you’re making a cozy winter accessory for yourself, a thoughtful handmade gift or a classic beanie for someone special, taking a few simple measurements can make all the difference.
Before starting your crochet beanie pattern, measure the head circumference and decide how long you want the finished hat to be. A little preparation helps you create a comfortable fit without the frustration of ending up with a beanie that’s too tight or too loose.
How to Measure for a Crochet Beanie
Follow these simple steps before you begin your project:
- Measure the head circumference: Wrap a flexible measuring tape around the widest part of the head, just above the eyebrows and ears. Keep the tape comfortably snug without pulling it too tight.
- Choose the finished hat circumference: Most fitted crochet beanies are made slightly smaller than the wearer’s head circumference to allow for stretch. The amount of negative ease depends on the yarn, stitch pattern, and desired fit.
- Measure the desired hat length: Measure from the top of the head down to where you want the bottom edge of the beanie to sit. Add extra length if you prefer a folded brim or a slouchy style.
- Check your gauge: Make a small swatch with your chosen yarn and crochet hook. This helps you estimate how many stitches and rows you’ll need to achieve your intended size.
Crochet Beanie Size Chart
Use this general crochet beanie size chart as a starting point. Actual measurements can vary depending on the yarn, stitch pattern, stretch and style of the hat.
| Size | Approx. Head Circumference | Suggested Finished Hat Circumference |
| Baby | 14-16 in (36-41 cm) | 12-14 in (30-36 cm) |
| Toddler | 16-18 in (41-46 cm) | 14-16 in (36-41 cm) |
| Child | 18-20 in (46-51 cm) | 16-18 in (41-46 cm) |
| Teen | 20-22 in (51-56 cm) | 18-20 in (46-51 cm) |
| Adult | 21-23 in (53-58 cm) | 19-21 in (48-53 cm) |
These measurements are approximate, not strict sizing rules. If possible, measure the intended wearer rather than relying on age alone, especially when making a handmade gift.
How to Get the Best Fit
If you’re learning how to crochet a beanie, remember that the finished size depends on more than the number of stitches. Yarn elasticity, crochet tension, and the stitch pattern all affect how the hat fits.
- For a snug beanie: Choose a finished circumference slightly smaller than the head measurement, allowing for comfortable stretch.
- For a relaxed fit: Leave a little more room, depending on the yarn and design.
- For a folded brim: Include enough extra length to fold the edge comfortably without making the hat too short.
- For a men’s crochet beanie: Measure the wearer’s head whenever possible instead of assuming every adult needs the same size.
Taking a few minutes to check your measurements before starting can save time and help you create a crochet beanie that feels as wonderful to wear as it was to make.
Crochet Stitches and Techniques You’ll Need
You don’t need to be an expert crocheter to create a beautiful handmade hat. One of the best things about this crochet beanie pattern is that learning a few basic stitches and techniques can help you feel more confident before you begin. With a little patience and practice, you’ll be one step closer to making a cozy beanie you can wear proudly or give as a heartfelt gift.
Before learning how to crochet a beanie, familiarize yourself with these essential stitches and techniques.
1. Chain Stitch (ch)
The chain stitch is one of the first skills most crocheters learn. It creates a foundation for many crochet projects and helps you get comfortable holding your yarn and hook.
If you’re new to crochet, practice making a short, even chain before starting your beanie. Try not to pull the yarn too tightly, as a tight foundation chain can make your work difficult to crochet into.
2. Single Crochet (sc)
Single crochet creates a compact, sturdy fabric that works well for many cozy accessories. It’s a useful stitch for beginners because it’s easy to learn and gives you good control over the shape and texture of your project.
Depending on the design, single crochet can help you create a simple, comfortable crochet beanie with a clean finish.
3. Half Double Crochet (hdc)
Half double crochet is a versatile stitch that creates a little more height than single crochet. It can help you work through your rows more quickly while producing a fabric that feels comfortable and substantial.
This stitch is a popular option for simple beanie crochet patterns because it balances ease of use with a lovely, practical texture.
4. Slip Stitch (sl st)
A slip stitch is useful for joining rounds, moving across stitches without adding much height, and finishing certain crochet projects neatly.
If your chosen crochet beanie design is worked in the round, slip stitches may help you join each round. Some patterns, however, are worked continuously or in rows, so always follow the construction method specified in your instructions.
5. Working in Rows or Rounds
Crochet beanies can be made in several ways. Some are worked in rows to create a rectangle that is seamed into a hat, while others are crocheted in joined or continuous rounds.
Working in rows: This method can be beginner friendly because you work back and forth, then seam the piece and close the crown according to the pattern.
Working in rounds: This method creates the hat as a tube or from the crown downward, depending on the design. Stitch markers can help you keep track of your rounds.
Neither method is automatically best for everyone. Choose a construction technique that matches your skill level and the finished style you want.
6. Weaving in Ends and Finishing
Finishing is what helps your handmade beanie look neat and ready to wear. After completing the crochet work, use a yarn needle to weave in loose ends securely. If your pattern requires a seam, take your time to align the edges so the finished hat looks tidy and feels comfortable.
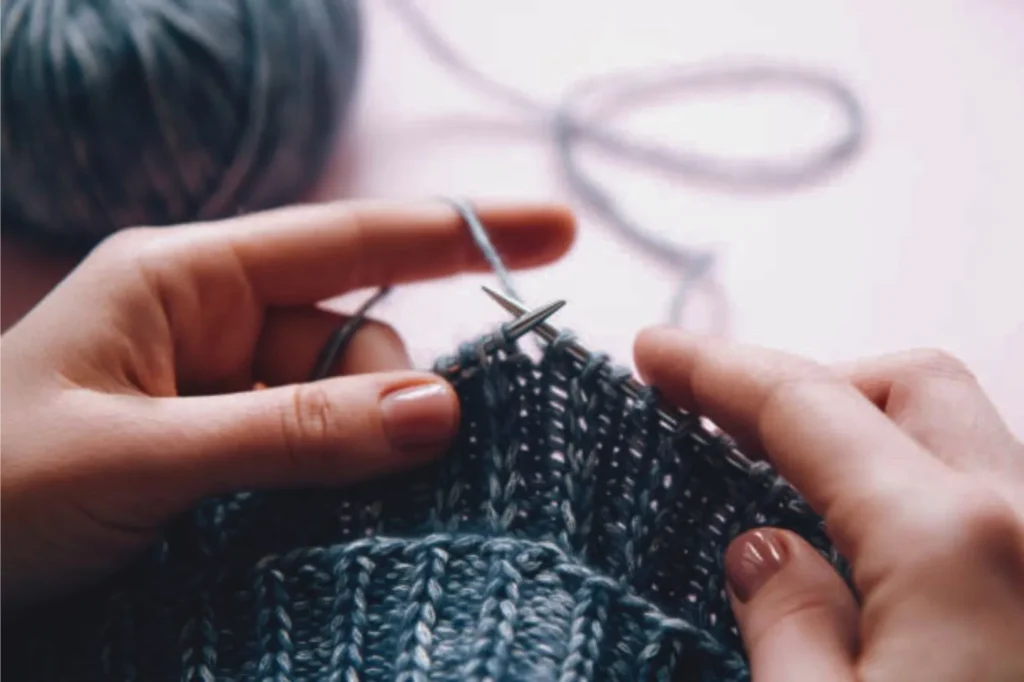
Beginner Tip: Practice each stitch with a small yarn swatch before starting your crochet beanie pattern. A little practice can help you maintain even tension, understand the stitch abbreviations and enjoy the process instead of worrying about every loop.
Remember, every confident crocheter started somewhere. Take your time, enjoy choosing your favorite yarn and celebrate each step as you turn a simple strand of yarn into something warm, personal and uniquely yours.
How to Crochet a Beanie: Step by Step Instructions
Making your own crochet beanie is a wonderful way to turn a simple ball of yarn into something warm, beautiful and personal. If you’ve been wondering how to crochet a beanie, this beginner friendly ribbed design is a lovely place to start. You’ll work a simple rectangle, seam it into a tube and gather the top to create a classic winter hat.
Follow each step at your own pace and remember that handmade projects don’t have to be perfect to be special. A little patience and care can turn your first crochet beanie into an accessory you’ll be proud to wear or share with someone you love.
Materials
Before starting this free crochet beanie pattern, gather the following supplies:
- Medium weight yarn (Category 4), approximately 150-200 yards for one adult beanie.
- 5.0 mm (H-8) crochet hook, or the size needed to achieve a comfortable fabric.
- Scissors.
- Yarn needle for seaming and weaving in ends.
- Measuring tape.
- Stitch markers, if helpful.
Note: Yarn requirements and hook size can vary depending on your tension, yarn brand and desired fit.
Step 1: Make the Foundation Chain
Start by making a slip knot and placing it on your crochet hook.
Chain until your foundation measures approximately 9-10 inches long for an adult beanie. This measurement determines the height of your hat, including any folded brim.
For a shorter beanie, make a shorter foundation chain. For a longer, slouchier style, increase the length slightly.
Step 2: Work the First Row
Insert your hook into the second chain from the hook and make one single crochet stitch. Continue working one single crochet into each chain across the row.
When you reach the end, chain 1 and turn your work.
Take a moment to count your stitches. Keeping the same stitch count throughout the project helps create a neat rectangle and makes the finished crochet beanie easier to assemble.
Step 3: Create the Ribbed Texture
For the next row, make one single crochet stitch in the back loop only of each stitch across.
The back loop is the loop farther away from you when looking at the top of a stitch. Working into this loop creates the raised lines that give a ribbed crochet beanie its stretchy, textured appearance.
At the end of the row, chain 1 and turn.
Repeat this process, working single crochet stitches into the back loop only on every row, until your rectangle measures approximately 20-21 inches long for a typical adult beanie.
This is a starting measurement rather than a universal rule. Check the rectangle against the intended wearer’s head circumference, allowing for the stretch of the ribbed fabric and a comfortable fit.
Step 4: Shape the Rectangle into a Beanie
Once your rectangle reaches the desired length, fasten off the yarn, leaving a long tail for sewing.
Fold the rectangle in half so the two shorter edges meet. Use your yarn needle to sew these edges together securely, creating a tube.
Try to keep the seam neat and comfortable. This seam will sit along the side or back of your finished crochet beanie.
Step 5: Gather and Close the Top
Thread your yarn needle with the long yarn tail.
Along one open edge of the tube, weave the needle in and out through the ends of the rows, working around the entire opening. Gently pull the yarn to gather the fabric until the opening closes.
Secure the gathered top with several small stitches, making sure the closure is firm. Weave in the remaining yarn end carefully.
You should now have the basic shape of your handmade beanie.
Step 6: Fold the Brim and Finish Your Beanie
Turn the beanie right side out and fold the bottom edge upward to create a comfortable ribbed brim.
Adjust the fold to suit your preferred style. A wider folded brim creates a classic winter look, while a smaller fold gives the hat a simpler finish.
Weave in any remaining loose ends and gently shape the hat with your hands.
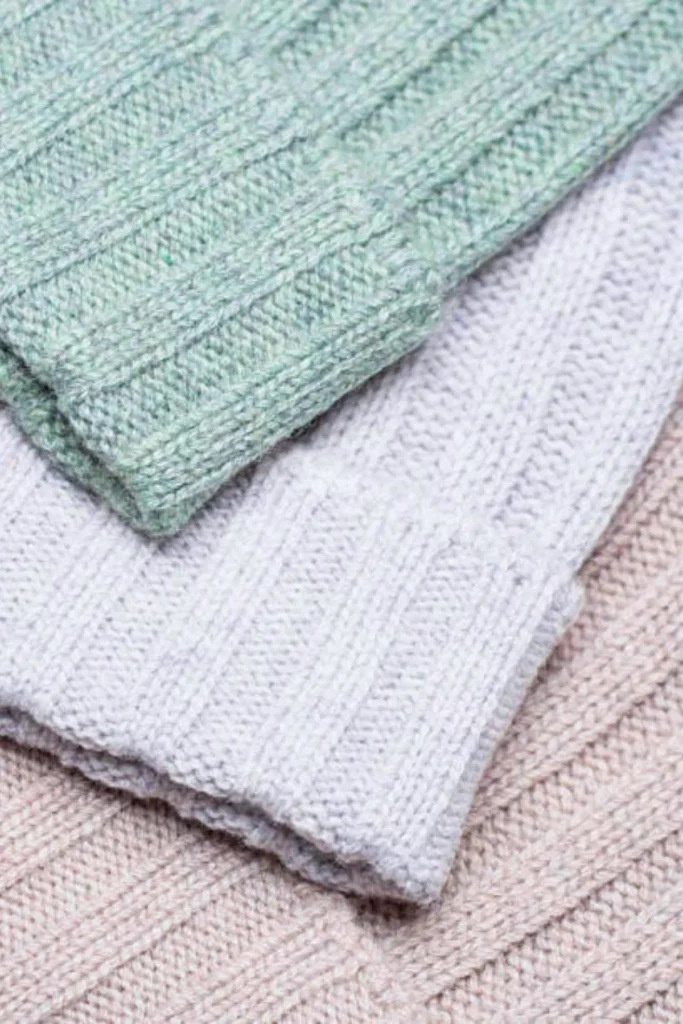
Congratulations! You’ve turned a simple rectangle into a cozy crochet beanie you can wear on chilly mornings, take on winter walks, or give as a thoughtful handmade gift.
How to Customize Your Crochet Beanie Pattern
One of the best things about making your own crochet beanie is how easy it is to personalize the design.
- Choose your favorite colors: Neutral shades create a timeless look, while brighter colors make your beanie stand out.
- Adjust the length: Make a shorter hat for a closer fit or add extra length for a slouchier style.
- Make a folded brim: Fold the lower edge for extra warmth around the ears.
- Create a men’s beanie: Try charcoal, navy, olive green, or black for a classic, versatile style.
- Add a pom pom: Attach a yarn or faux fur pom pom if you want a playful finishing touch.
With a few simple adjustments, this beanie crochet pattern can become a design that reflects your personality or the style of the person receiving it.
Tips for Getting the Perfect Crochet Beanie Fit
There’s nothing more satisfying than finishing a handmade beanie that feels just as good as it looks. The right fit can make your crochet project even more special, whether you’re making a cozy winter accessory for yourself or creating a thoughtful gift for someone you love.
If you’re following this crochet beanie pattern for the first time, a few simple adjustments can help you create a hat that feels comfortable, looks neat and suits your personal style.
1. Measure Before You Start
One of the easiest ways to improve the fit of your crochet beanie is to measure the intended wearer’s head before beginning. Measure around the widest part of the head, just above the eyebrows and ears.
For a stretchy ribbed beanie, the finished circumference is often slightly smaller than the head measurement. The amount of stretch depends on your yarn, stitch tension and construction, so avoid making the hat too tight.
2. Check Your Crochet Tension
Consistent tension helps your stitches look even and keeps your beanie close to the intended size. If you crochet very tightly, your finished hat may turn out smaller and feel stiff. If your stitches are too loose, the fabric may feel floppy or stretch more than expected.
Practice a small swatch before starting your crochet beanie pattern. If the fabric feels too tight, try a larger hook. If it feels too loose, try a smaller hook and compare the results.
3. Adjust the Length for Your Preferred Style
The length of your rectangle determines how tall your finished beanie will be. A shorter rectangle creates a closer fitting hat, while a longer one gives you extra fabric for a folded brim or a relaxed, slouchy appearance.
Before sewing the rectangle closed, compare its length with the fit you want. This small check can help you avoid having to undo your work later.
4. Choose Yarn That Feels Comfortable
The best crochet beanie is one you’ll actually enjoy wearing. Soft acrylic yarn is a practical choice for everyday use, while suitable wool blends can offer extra warmth in cold weather.
If possible, choose a yarn that feels comfortable against your forehead. The yarn’s elasticity also matters: a ribbed design made with a stretchy yarn may fit differently from one made with a firm, less elastic yarn.
5. Make Small Adjustments Instead of Guessing
If your beanie looks too narrow, don’t immediately add lots of extra rows. First, check the rectangle’s dimensions and stretch. If it looks too short, consider adding a few more rows before seaming.
For crochet beanies for guys or anyone with a larger or smaller head, taking actual measurements is more reliable than choosing a size based on age or gender alone.
6. Finish the Crown Securely
When gathering the top of your beanie, pull the yarn gradually and distribute the gathers evenly around the opening. Avoid pulling so aggressively that the fabric becomes bulky or the yarn breaks.
Secure the gathered opening with several small stitches, then weave in the yarn end carefully. A neat finish helps your handmade crochet beanie look polished and makes it more comfortable to wear.
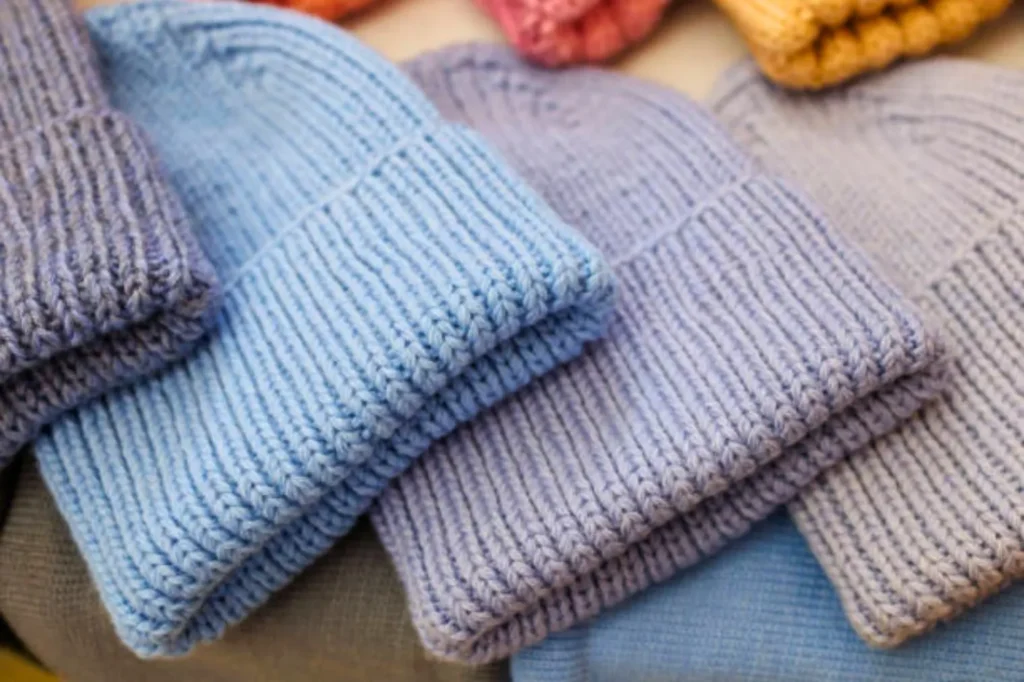
Final Tip: Don’t worry if your first crochet beanie isn’t absolutely perfect. Every project teaches you something new about yarn, tension and fit. Enjoy the process, make adjustments where needed, and take pride in creating something useful with your own hands.
Common Crochet Beanie Mistakes and How to Fix Them
Making your first crochet beanie should be an enjoyable experience, not a frustrating one. Even if you’re following a beginner friendly crochet beanie pattern, a few small mistakes can affect the shape, size or finish of your hat. The good news is that most of these problems are easy to fix once you know what to look for.
If your first attempt doesn’t turn out exactly as expected, don’t be discouraged. Every crochet project is an opportunity to learn, improve your skills and create something you’ll be proud to wear or share.
1. Your Crochet Beanie Is Too Tight
If your finished beanie feels uncomfortable or is difficult to pull over your head, your stitches may be too tight or the hat may be too small.
How to fix it:
- Check the finished measurements against your head circumference.
- Try a larger crochet hook if your stitches are unusually tight.
- If the rectangle is too short, add more rows before seaming.
- Choose a yarn with suitable stretch for a comfortable fit.
Remember that changing your hook size affects the fabric as well as the measurements, so make a small swatch before reworking the entire project.
2. Your Beanie Is Too Loose
A crochet beanie that slips down or feels floppy may have too much ease, loose stitch tension or a yarn that stretches more than expected.
How to fix it:
- Measure the rectangle before sewing it into a tube.
- Check whether your yarn relaxes or stretches after handling.
- Try a smaller hook if your stitches are too loose.
- Adjust the finished circumference to suit the intended wearer.
A little stretch is useful, but the goal is a beanie that stays comfortably in place without feeling restrictive.
3. Your Rectangle Has Uneven Edges
If one side of your crochet rectangle looks wider or more uneven than the other, you may be accidentally adding or skipping stitches at the beginning or end of rows.
How to fix it:
- Count your stitches at the end of each row.
- Remember to make the turning chain specified in your pattern.
- Place a stitch marker in the first or last stitch if you find row edges difficult to identify.
- Work under consistent lighting so you can see the top of each stitch clearly.
Keeping the same stitch count helps your rectangle maintain its shape and makes the final seam easier to sew.
4. The Ribbed Texture Doesn’t Look Consistent
The ribbed look in this crochet beanie pattern comes from working into the back loop only. If you accidentally crochet through both loops on some stitches, the texture may look uneven.
How to fix it:
- Identify the back loop before inserting your hook.
- Check the first few stitches of each row.
- Practice on a small swatch if you’re unfamiliar with back loop only crochet.
- Undo a few stitches and correct the mistake rather than continuing if the difference is noticeable.
With practice, the raised lines will become easier to recognize and your finished beanie will look more consistent.
5. The Top of Your Beanie Won’t Close Neatly
When you gather the top of a rectangle style beanie, uneven gathering can leave a small opening or create bulky folds.
How to fix it:
- Use a long yarn tail and a yarn needle.
- Weave the needle evenly through the row ends around the opening.
- Pull the yarn gradually instead of tightening it all at once.
- Secure the closure with several small stitches before weaving in the end.
Take your time with this step. A neat crown can make a simple handmade beanie look much more polished.
6. The Seam Feels Bulky or Uncomfortable
A thick seam can make your crochet beanie uncomfortable, particularly when it sits against the head.
How to fix it:
- Align the two edges carefully before sewing.
- Use a yarn needle and a suitable seaming method.
- Avoid pulling the sewing yarn so tightly that the fabric puckers.
- Check the seam from the inside before weaving in the final ends.
A smooth, secure seam helps your handmade hat feel comfortable and look tidy.
Final Troubleshooting Tip
If something doesn’t look right, pause before undoing the entire project. Check your measurements, stitch count, yarn tension and construction method first. Often, a small correction is all you need.
Learning how to crochet a beanie takes patience, but each project helps you understand your materials and techniques a little better. Give yourself permission to learn as you go and enjoy the satisfaction of making something warm and personal with your own hands.
How to Customize Your Crochet Beanie Design
One of the most beautiful things about making your own crochet beanie is the freedom to turn a simple pattern into something that feels uniquely yours. A change in color, a different brim or a small finishing detail can transform your handmade hat into a thoughtful gift or a favorite accessory you’ll reach for every winter.
Once you’re comfortable with this crochet beanie pattern, try these simple ways to personalize your finished design.
1. Choose Colors That Match Your Style
Color is one of the easiest ways to make your crochet beanie feel special. Choose a neutral shade for a timeless everyday look, or experiment with brighter colors if you want your hat to stand out.
Here are a few ideas to inspire you:
- Classic and timeless: Black, cream, gray or navy.
- Warm and earthy: Rust, olive green, mustard or brown.
- Soft and cozy: Blush pink, lavender or pastel blue.
- Bold and playful: Color blocked combinations or stripes in your favorite shades.
If you’re making crochet beanies for guys, charcoal, navy, forest green and earthy neutrals are versatile options. However, the best color is always the one that suits the person who will wear it.
2. Experiment With the Brim
The brim can change both the appearance and feel of your crochet beanie design.
- Folded brim: Creates a classic winter look and adds another layer of fabric around the ears.
- Narrow brim: Gives the hat a simple, streamlined appearance.
- Longer ribbed brim: Creates a more relaxed style that can be folded to your preferred height.
Because the brim affects the overall length of the hat, check your measurements before finishing the rectangle. This helps you achieve the look you want without making the beanie unexpectedly short.
3. Add a Pom Pom for a Playful Finish
A pom pom can give your handmade beanie a fun, cozy appearance. You can make one from matching yarn, choose a contrasting color or use a suitable ready made pom pom.
Attach it securely to the crown and check that it feels comfortable when you wear the hat. For a more understated style, leave the top plain for a clean, classic finish.
4. Create a Men’s Crochet Beanie
A male crochet beanie can be simple, stylish and practical. For a classic look, choose a solid color and a clean ribbed texture. A folded brim can add warmth and give the finished hat a traditional winter style.
The most important part is getting the fit right. Measure the intended wearer’s head rather than assuming that every man needs the same size. You can also adjust the length to create a closer fit or a more relaxed silhouette.
5. Make a Thoughtful Handmade Gift
A crochet beanie can become much more meaningful when you choose the colors and details specifically for the person receiving it. Make one in a friend’s favorite color, create matching hats for family members or prepare a cozy winter gift for someone who appreciates handmade items.
If you’re planning to make several crochet beanies, keep notes about the yarn, hook size, measurements and adjustments you use. This makes it easier to recreate a favorite design or personalize the next hat.
The beauty of a handmade crochet beanie is that it doesn’t have to look exactly like anyone else’s. With a little creativity, you can turn this simple pattern into something personal, practical and full of care.
Frequently Asked Questions About Crochet Beanie Patterns
1. Is This Crochet Beanie Pattern Suitable for Beginners?
Yes! This crochet beanie pattern is designed for beginners who know a few basic crochet stitches. The rectangle based construction makes it easier to work on the hat before sewing the side seam and gathering the top. Take your time, count your stitches and check your measurements as you go.
2. How Much Yarn Do I Need to Crochet a Beanie?
For a basic adult crochet beanie, approximately 150-200 yards of medium weight yarn is a reasonable starting estimate. The exact amount depends on your yarn, hook size, stitch tension, hat length and whether you add a folded brim or pom pom. Check your yarn supply before starting so you can finish your project without running short.
3. Can I Make This a Free Crochet Beanie Pattern?
Yes. You can follow the complete instructions in this tutorial without purchasing a pattern. Gather your yarn and crochet hook, follow each step and use the sizing guidance to adjust the hat to your needs.
4. How Do I Make a Crochet Beanie Fit Properly?
Measure the wearer’s head circumference before starting and compare it with the finished hat measurements. A ribbed beanie usually needs some negative ease because the fabric stretches, but the ideal amount depends on the yarn and stitch pattern. Checking your gauge and measuring the rectangle before seaming can help you achieve a more comfortable fit.
5. Can I Use This Beanie Crochet Pattern to Make a Men’s Hat?
Absolutely! You can customize this crochet beanie pattern for men by choosing colors such as black, navy, gray or olive green. Measure the intended wearer’s head and adjust the dimensions rather than relying on color or gender alone to determine the size.
6. Is It Easier to Crochet a Beanie in Rows or in the Round?
Both methods can work well. A rectangle worked in rows can be beginner friendly because you create a flat piece before seaming it into a hat. Working in the round can reduce or eliminate the need for a side seam, depending on the design, but it may require keeping track of rounds and shaping. Choose the method that best matches your skill level and preferred style.
7. What Is the Best Yarn for a Crochet Beanie?
Medium weight acrylic yarn is a practical choice for many beginner crochet beanies because it is widely available, comes in many colors, and is generally easy to care for. Wool and wool blend yarns can offer warmth and elasticity. Choose a yarn that feels comfortable against the skin and works well with your chosen stitch pattern.
8. How Can I Make My Crochet Beanie Look More Professional?
Focus on consistent stitch tension, even edges, a secure seam and a neatly gathered crown. Weave in all loose ends and check the fit before considering the project finished. Small details can make a simple handmade beanie look polished and gift ready.